Construction of Quilts for Langstroth Hives
We have read volumes of books and watched hours of videos,,, and soon began to realize everyone is not an expert despite what they seem to portray.
I did find however, one web site that I was impressed with. The web site is http://www.honeybeesuite.com/ and is authored by Rusty a very personable and friendly young lady. She may dispute the young part, but i’m sticking by my guns. In the summer of 2012 she authored an article “How to make a moisture quilt for a langstroth hive” It can be found at http://www.honeybeesuite.com/how-to-make-a-moisture-quilt-for-a-langstroth-hive/
Not in the original article but in a follow up she mentioned that she overwintered 10 out of 10 hives through the winter with no losses. For me that was game on, I had to have some. If you read her article and follow up question and answers you can see what she did and then see what I have done to address some of the concerns.
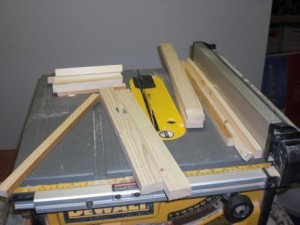
First pick up some lumber and head to the table saw and cut cut cut,,, until you have about as much saw dust as finished wood.
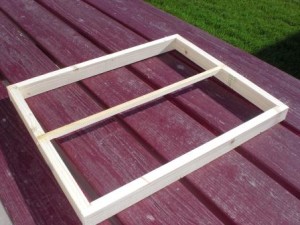
Then go to the bench to start gluing and nailing it all together. Note the strip of wood down the center, used to glue the fabric to, and keep the fabric from sagging.
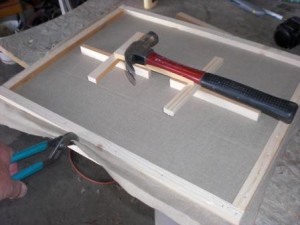
With a small bead of glue around the edge and center, I added the canvas and nailed it on with a rim. This will keep the fabric from hanging low and touching the top of the frames, allowing the bees to cross over from frame to frame in the winter. With the glue half set, I pull the fabric tight with pliers, and then cut off the excess. Note there is no opening in the rim to provide an upper entrance or ventilation. I worried about this decision. I concluded that if the quilt takes care of the moisture, I would not need an opening to vent it out. My other big concern was an upper opening for cleansing flights should the bottom become plugged with snow. (see last paragraph) My hope was a warmer interior hive temperature.
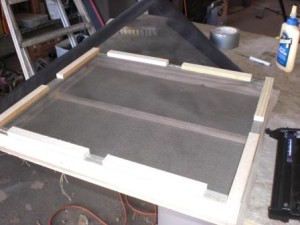
Turning it over I nailed wood strips over some plastic window screen. This provides area for the air to blow over the top of the quilt keeping it dry and the screen prevents the medium from blowing away.
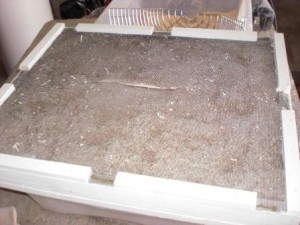
After a coat of paint, I cut a slit in the screen and stuffed it with saw dust from my dust collection system (wet dry vac) on my table saw. On my first set of quilts I used ground coconut husk. The coconut husk was very absorbent but I don’t think the sawdust will perform any different. The added benefit, it was free. The coconut husk we found at a local garden center, or can be found at a pet store.
Last November while replacing the inner covers with the quilts, my wife noticed a stream of water dripping off the corner of the inner cover as I lifted it up. During the winter I lifted the quilts to peak in on a perfectly calm 14 degree Fahrenheit day. I caught displeasure from the club when I told them this. In my defense I did not pull any frames to inspect. I only lifted the quilt and added a sugar cake and pollen patty, then closed it back up. During my peek, I could see no evidence of moisture in or on the quilt, only a tiny amount of frost on the inside top corner of the upper brood chamber. I guess I did this thinking in my mind that it would chill the bees less than leaving the screened bottom boards open all winter with wind blowing 50 mph at whatever temperature Mother Nature thought proper for the day.
Guess I should add that I overwintered 4 of my 4 hives. With 3 of the 4 coming out of winter with 20 frames covered with bees, and the fourth having 10 frames covered. Beginners luck or good idea, you decide.
Update… my second year i also overwintered 4 of 4 hives…. and this year,,, it is Feb. 2015 and all 5 of my 4 hives are alive and doing well… warm temps and the bees are bringing in truckloads of pollen. 5 of my 4 hives seems confusing. There are 4 production hives and the fifth is the bees from my queen castles that I combined last fall.
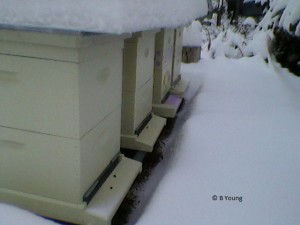
My other wintering parameters include: Bottom board with removable screen and plastic sign board, both installed and closed. Mouse guards installed with only 1/3 of the center available for the bees, the outside 1/3 of each was blocked. And finally after last fall’s election season, I found two 32 x 48 inch political sign boards. I put these on top of my telescoping covers with a big rock to hold them on. These provided an overhang to the hives preventing snow and ice buildup on the landing boards. Each sign covered 2 hives.
Happy building.
Boyd
byoung “at” youngbees “dot” com
material list
quantity, component size, location
2, ¾ x 1 ½ x 20 with ¼ deep x ¾ dado cut on each end, sides of box
2, ¾ x 1 ½ x 15 ¼, ½ x ½ dado cut in the center
2, ¾ x ½ x 20, sides of bottom rim
2, ¾ x ½ x 14 ¾, ends of bottom rim
8, ¾ x ½ x 7, segments of top rim
1, ½ x ½ x 20, center rib to glue fabric to
1, 22 x 18 inch light wt. canvas
1, 22 x 18 inch window screen (plastic)
1, ¼ cubic ft. ground coconut husk or sawdust
1, glue nails or brads
if you eliminate the dado’s on ends of sides of box, the ends of box should be 14 ¾
the bottom rim could be ¾ to 1 inch thick instead of ½ inch
or add a 1 inch rim under the quilt to place a zip lock baggy feeder under quilt
©boyd young 2013
Anyone had any experience with “Quilts” let me know good or bad.


I’ve had experience with “quilts”. It was made with excellent craftsmanship. One of my favorite things ever!!!
since i know what you refer to…… i had to LOL